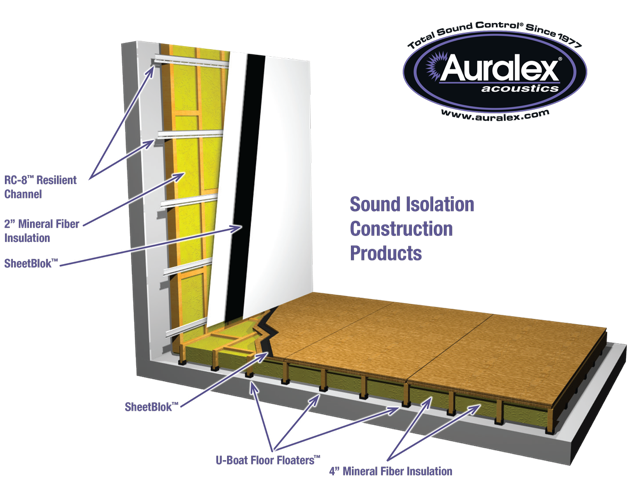
Sound Isolation Basics - How to Build a “Floating” Floor
Posted by Auralex on 14th Mar 2023
Have you heard someone use the term "sound-proofing"? It is often used in a general sense to mean any kind of acoustical treatment. However, Sound Isolation, or making a room "soundproof," can be a highly involved process. Isolation aims to stop the transfer of sound from one room to another by adding mass and different layers with different densities to achieve the highest results.
When isolating a room, it is important to approach your build from the ground up. The floor is the single most critical part of any sound-isolated or "floating" room. A floating room improves transmission loss (Isolation) and low-frequency definition, significantly reducing the impact of noise on neighboring occupants by cutting sound transfer between spaces.
Solid construction materials and authorized Auralex products are highly recommended. Always use appropriate safety equipment like gloves and safety glasses.
Project Overview
The floor is the single most critical part of any sound-isolated or "floated" room. A floated room features greatly improved transmission loss (isolation) and low frequency definition. A tight, floated room will always sound better!
Estimated Material Cost: $8/sq ft
Time: 2-3 Days
Guides Referenced in this Project
- Sound Isolation – What is it?
- What’s the best method to install SheetBlok?
- How much weight will U-Boats support?
Auralex Products Used in this Project
Construction Materials Used in this Project
- Wood or Metal Studs and Joists
- Plywood
- Particleboard
- Mechanical Fasteners & Adhesives
1. Frame Construction and Placement
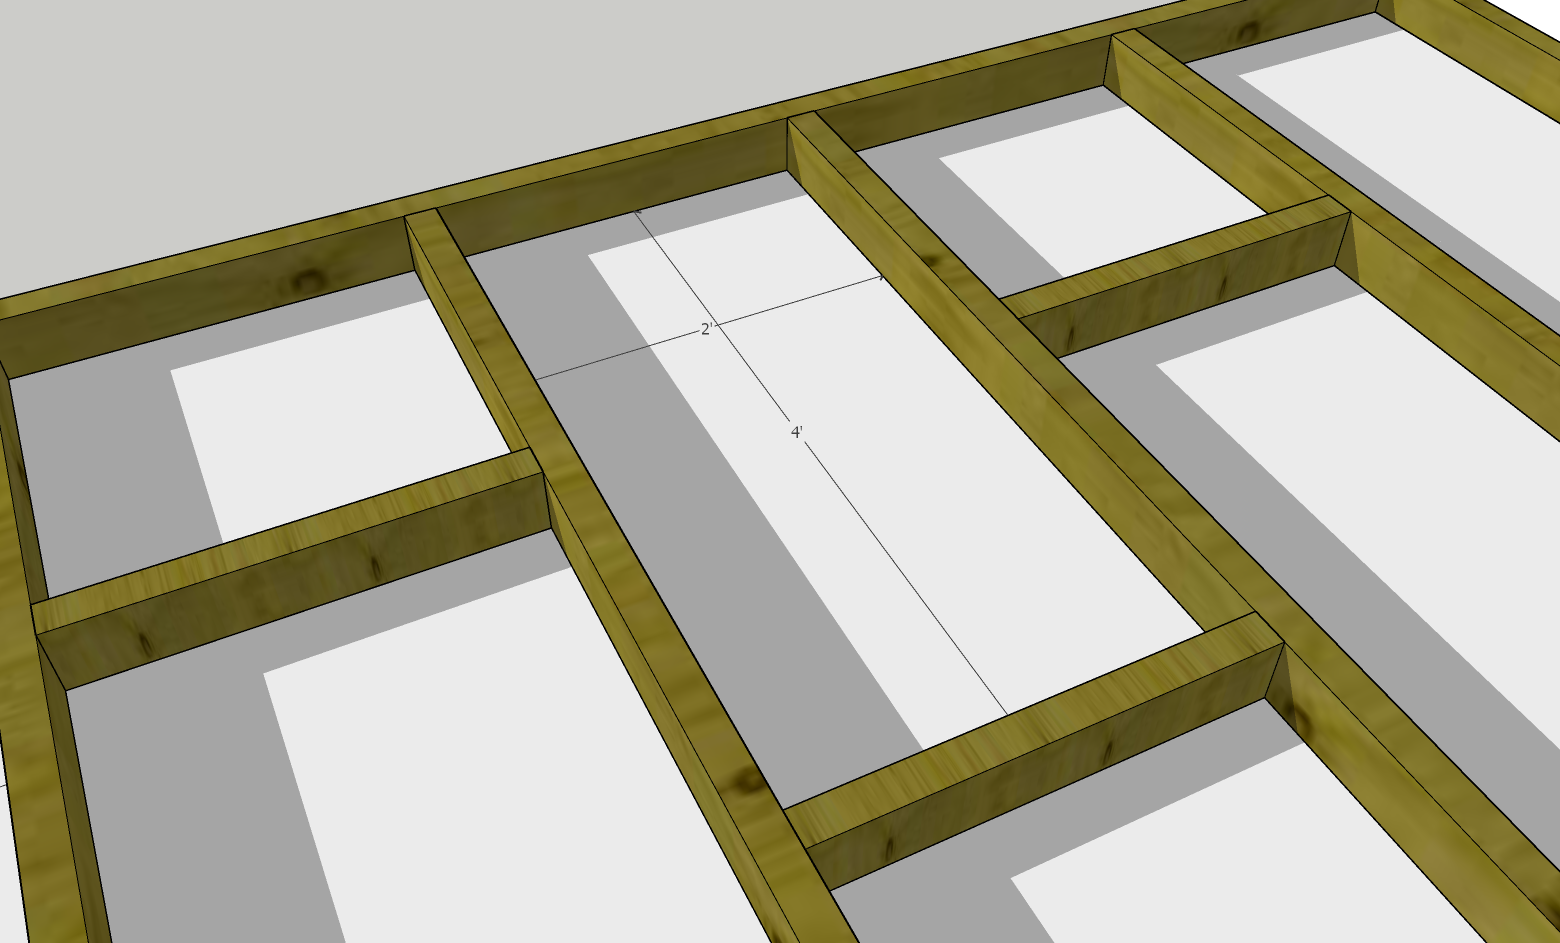
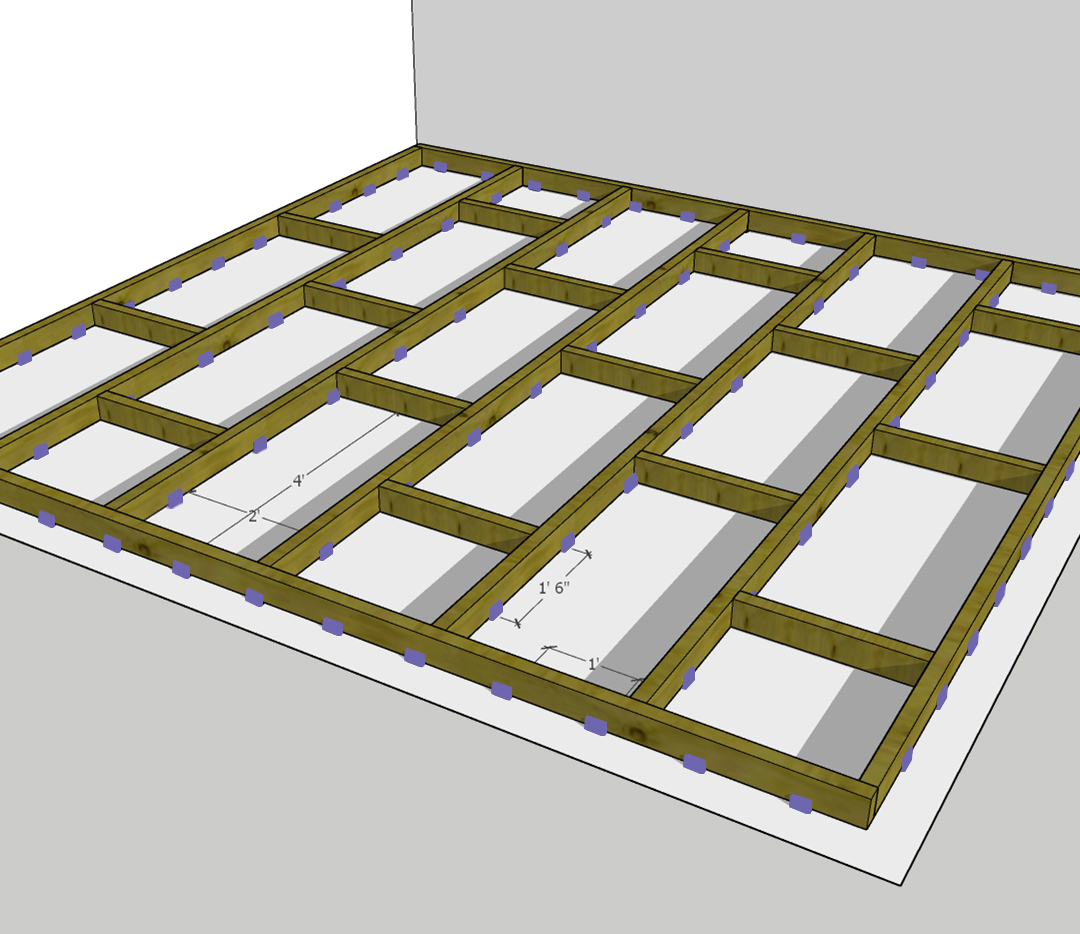
Construct the frame for your floating floor from 2’x4’ or 2x’6’ Wood Studs, spaced 2’ apart with stringers every 4’ (to match the dimensions of the Mineral Fiber insulation). To prevent wood warp and add stability, alternate stringer placement.
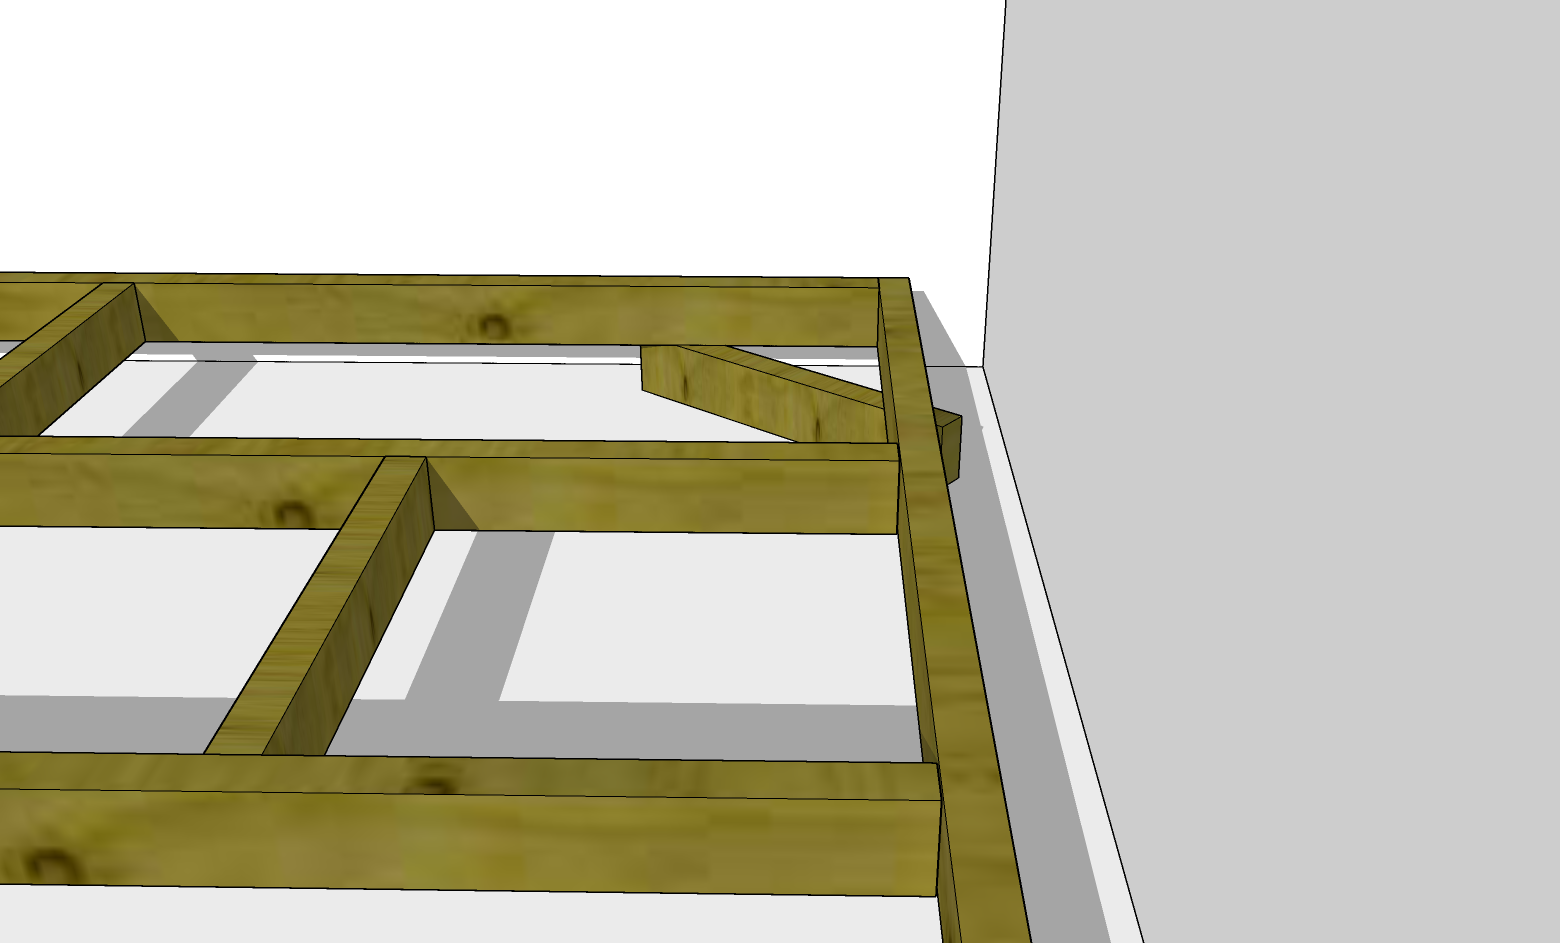
The floor frame will determine the size of your finished enclosure, so design your frame slightly smaller than the existing space. Once built, position your frame to maintain a 2” minimum gap around all sides and any existing structure.
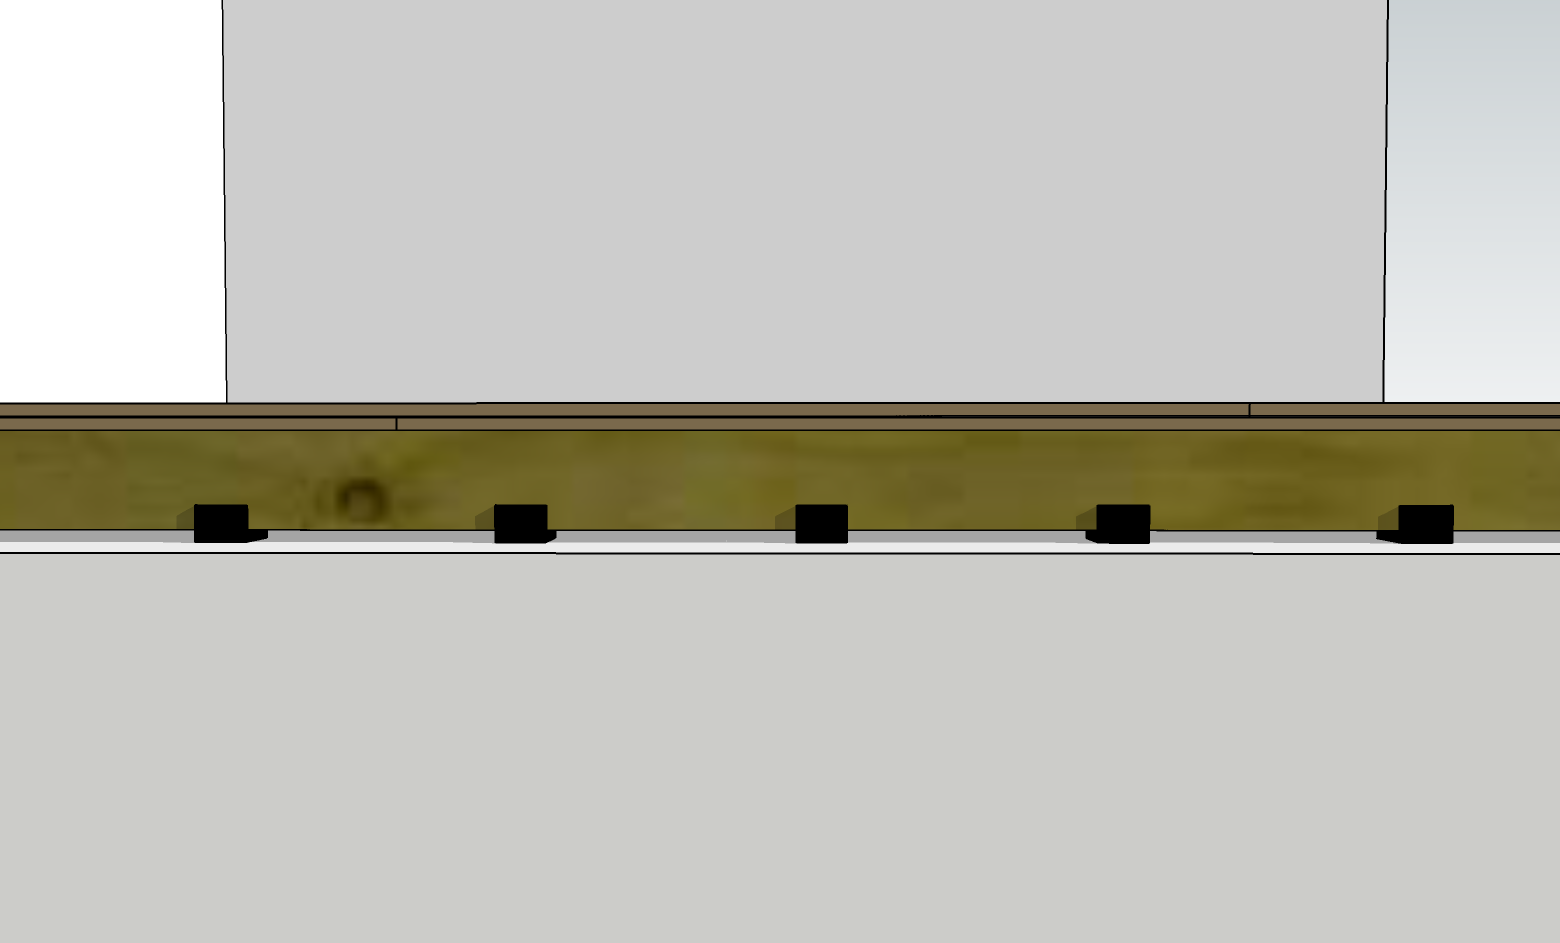
2. Installing U-Boat™ Floor Floaters
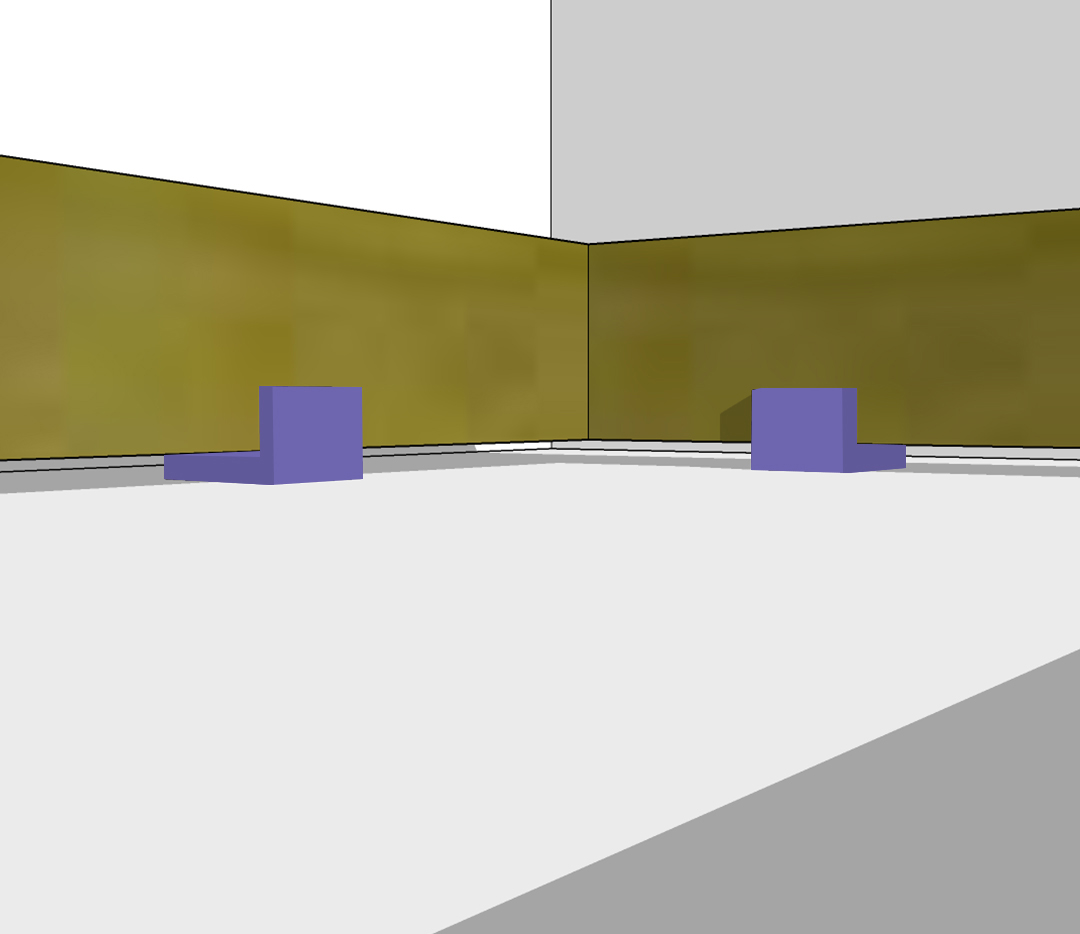
Made of a specially-formulated rubber compound, U-Boat™ Floor Floaters are our proprietary U-shaped channels used to support framing members and float (isolate and decouple) them from the surrounding structure. With the help of U-Boats, a floated room features greatly improved transmission loss (isolation) and low frequency definition (translated: a tight, floated room will always sound better!).

To prepare for U-Boat installation, lift your frame on risers using spare stud scraps.
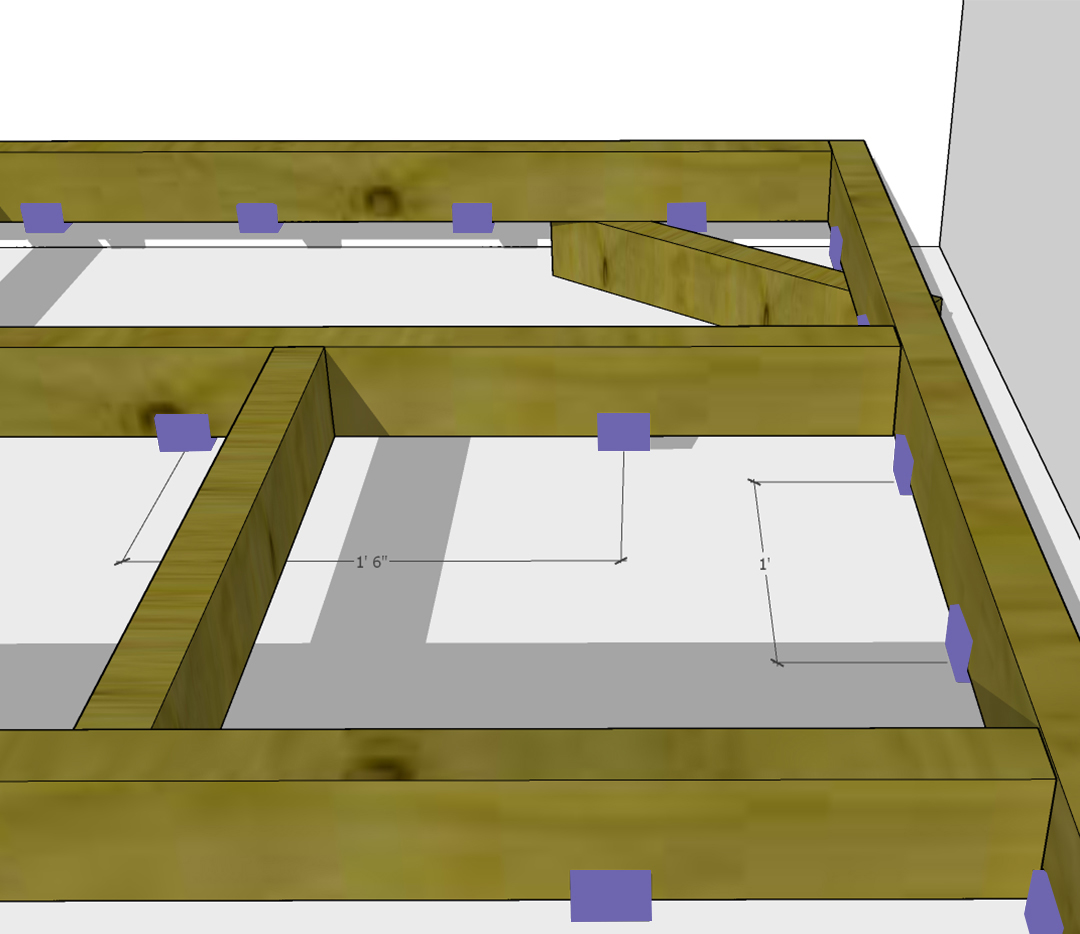
With the frame on risers, use a brad nail or staple to secure U-Boats every 1’ on all exterior members, and every 18” on all interior members.
With all U-Boats placed, remove the frame risers and drop the frame into place.
After removing the risers your new floor frame should rest cleanly on the installed U-Boats, ½” above the existing floor.
3. Installing Mineral Fiber Insulation
Mineral Fiber Insulation is the workhorse of our isolation materials. It is a insulation panel which provides acoustic isolation as well as typical insulation properties.
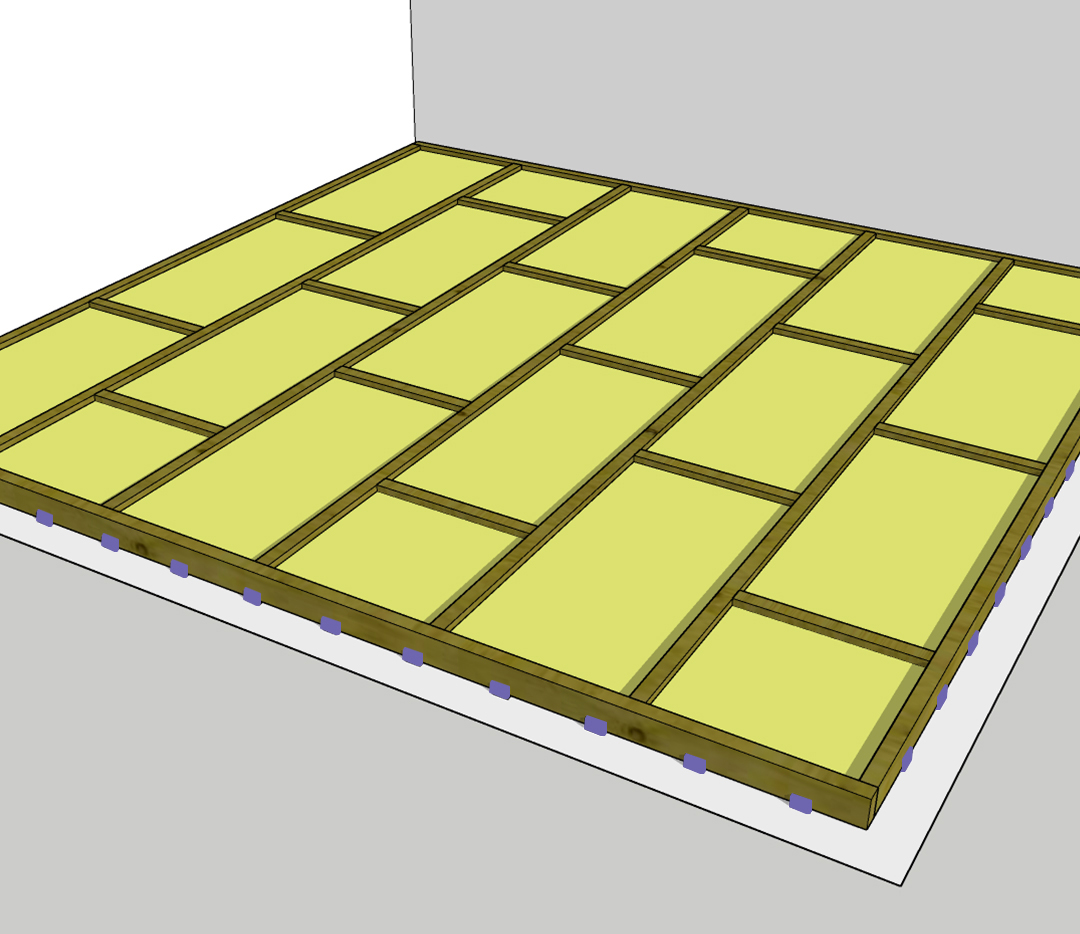
Place Mineral Fiber Insulation between each frame member, making necessary cuts to create a snug fit around all sides.
Allow the Mineral Fiber Insulation to float between the frame members by resting on the U-Boats. Additionally, there should be a small gap between the insulation and the top of the studs, where your sub floor will rest
4. Sub-Floor - First Layer
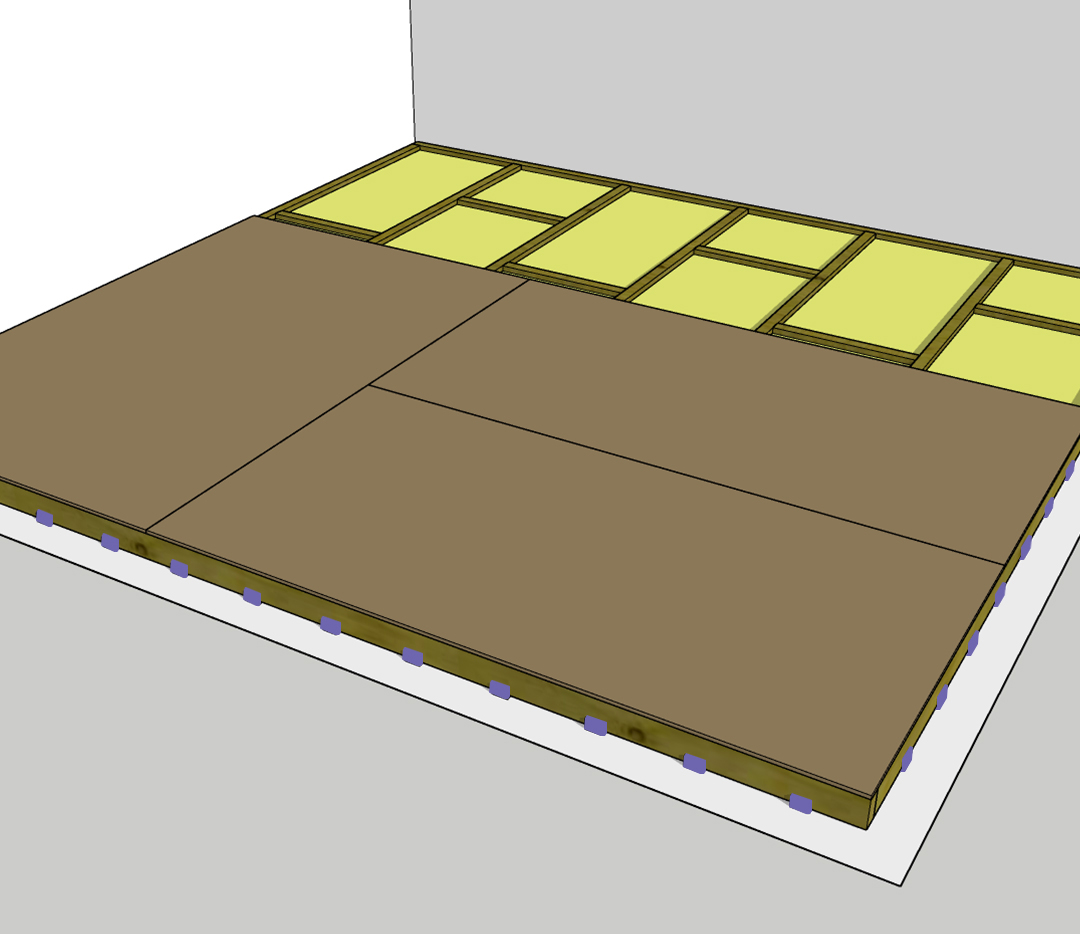 Install your first layer of subfloor, using StopGap™ Sealant between each seam. Take note of the location and direction of the seams in your subfloor material.

5. SheetBlok™ Sound Barrier Installation
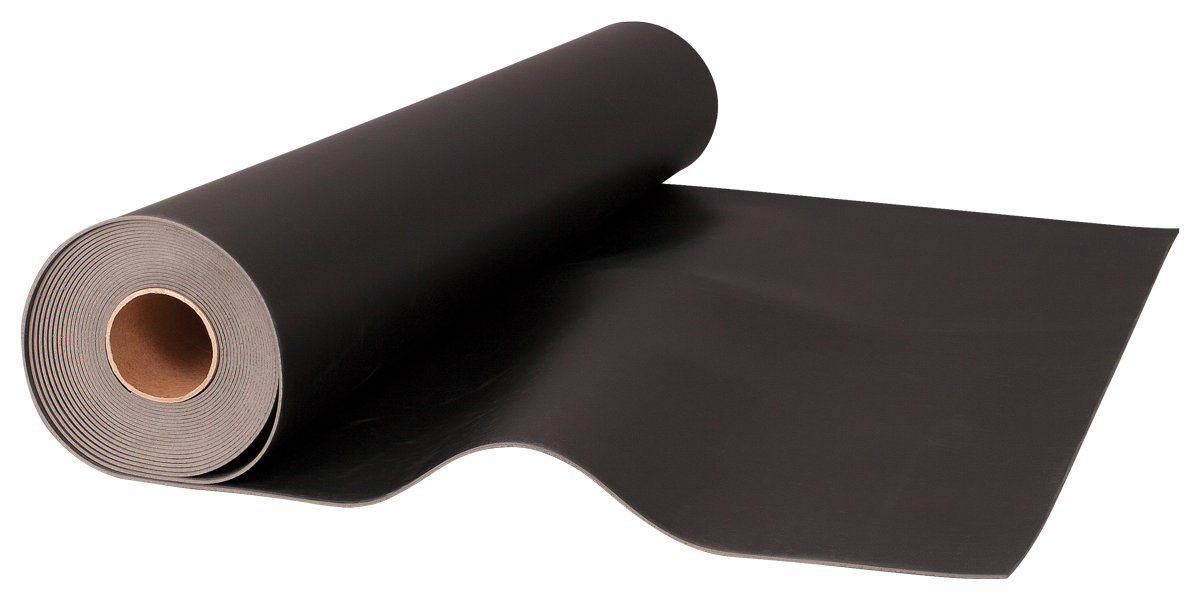
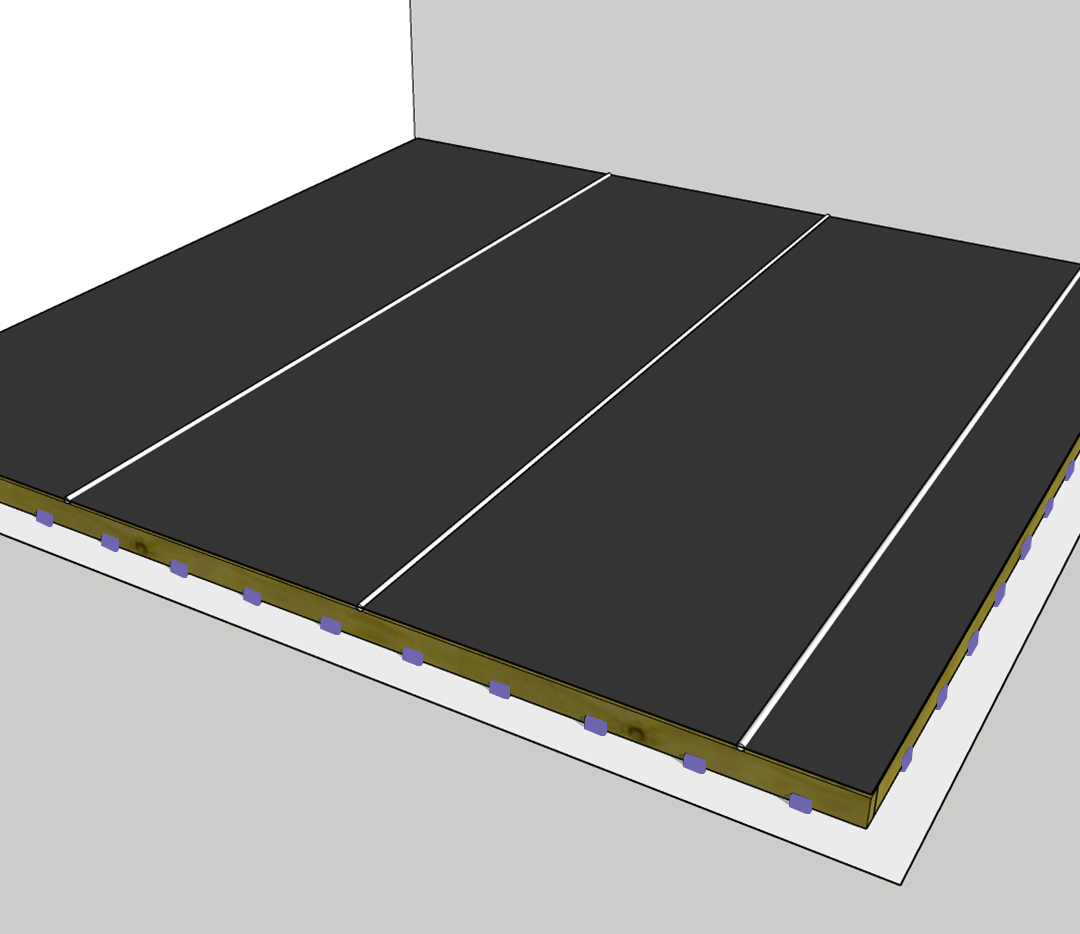 Install a layer of SheetBlok™ Sound Barrier on top of your first layer of subfloor, laying the sheets in a different direction than the subfloor - minimizing air flow, and thus sound transfer. As a further counter-measure, fill all seams in the SheetBlok with StopGap™ Sealant.
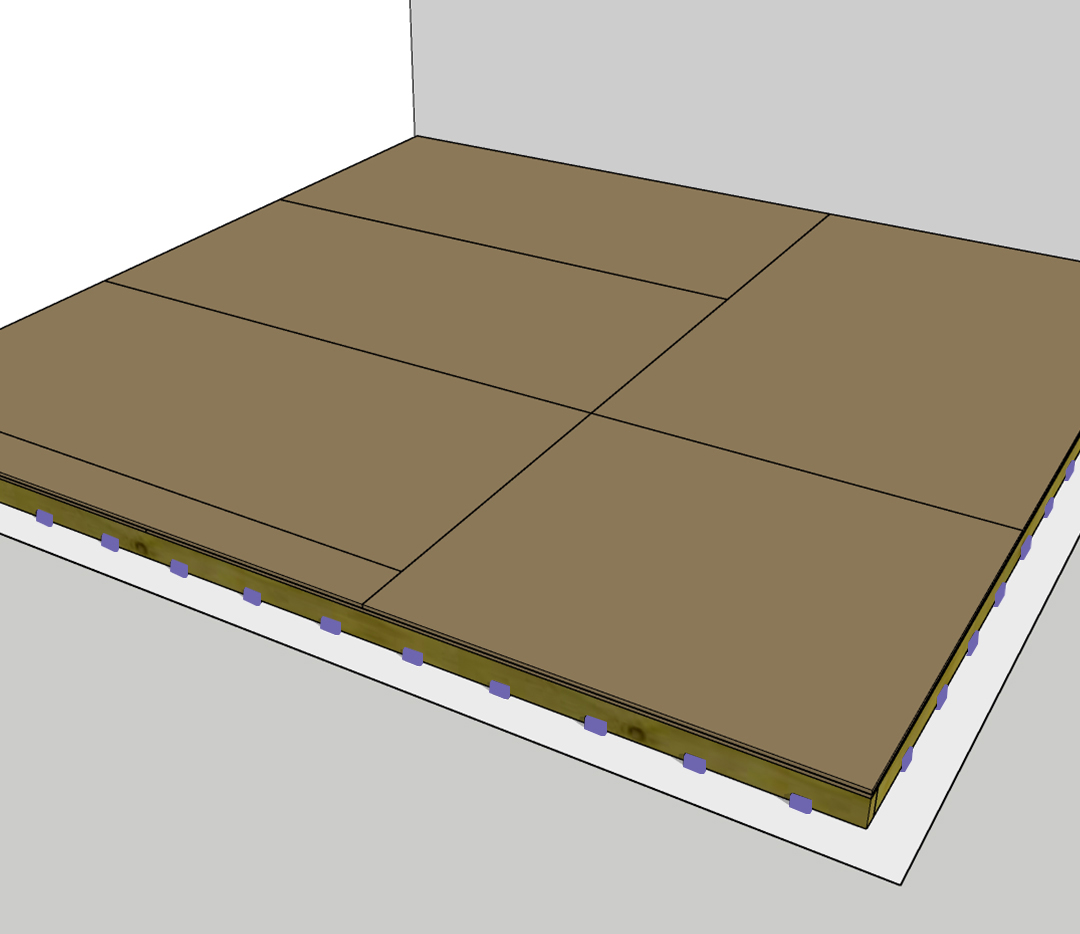
6. Subfloor - Final Layer
Install your second layer of subfloor again in an alternating pattern, not allowing seams to overlap. Once the rest of the room build is complete and we’re ready to lay our finished flooring, we will complete this subfloor with a final application of StopGap™ Sealant between the seams.
When complete, the SheetBlok can be viewed between the two layers of subfloor, with offset seams.